


Why Saddle Fit Matters
A properly fitted saddle is one of the most important investments you can make for both horse and rider. An ill-fitting saddle can pinch, rub, or create pressure points that cause back pain, soreness, and even long-term injury.
For the rider, poor fit affects balance, security, and overall comfort. A well-fitted saddle allows your horse to move freely and perform at its best while giving you a balanced, enjoyable ride.
Learning how to measure your horse for a saddle ensures safety, comfort, and a strong partnership every time you ride.
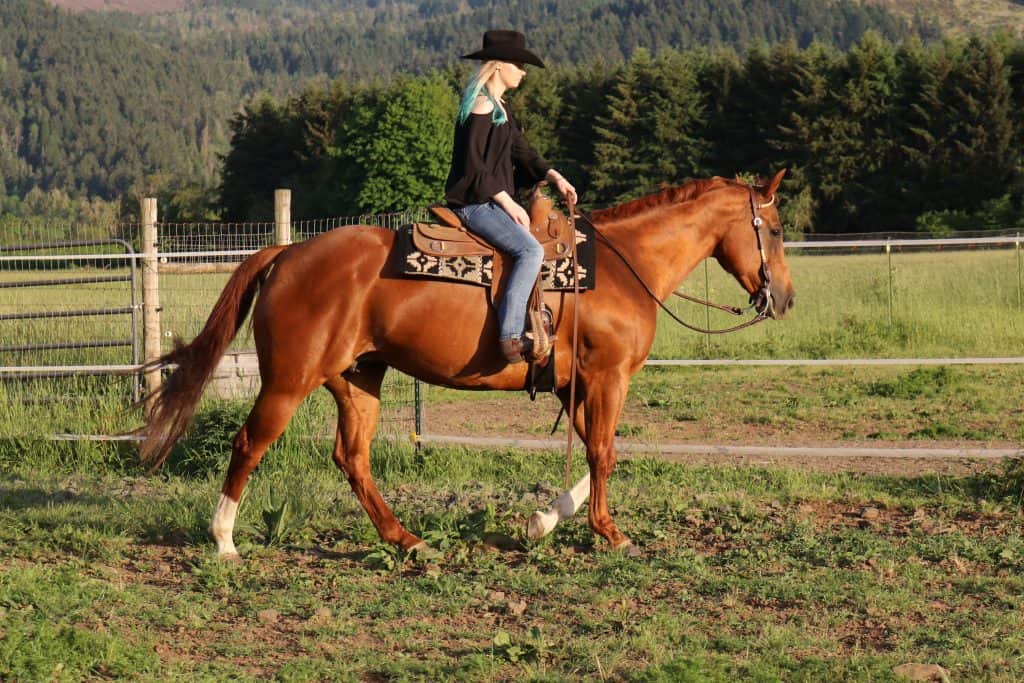
A properly fitted saddle protects both horse and rider.
Step 1: Assess Your Horse’s Conformation for Saddle Fit
Stand your horse square on level ground. Look closely at the withers, shoulder angle, and topline.
- Withers height and shape
- Sharp/high/narrow withers: Make sure its not too upright in the front and can flare a bit. Too tight a fit can rub and pinch.
- Flat/low withers: Wider gullet needed to avoid risk of bridging where panels don’t touch evenly.
- Shoulder angle
- Steep shoulders: The saddle will need more clearance at the front so the shoulder can rotate under the front of the saddle without pinching.
- Flatter shoulders: There is a little more forgiveness with the tree point angles, but make sure the saddle sits 2-3” behind the scapula for free movement.
- Topline / back shape
- Run your hand along the back. Is it flat, dipped, or arched?
- Flat backs: Choose flatter panels/bars to avoid rocking and pressure at front or back.
- Dipped/swayed backs: Choose panels with more “rock,” possibly upswept rear panels or shorter panel length to avoid bridging and loin pressure.
- Short backs: The saddle will need shorter panels to keep weight off the lumbar and keep the saddle from interfering with hip movement.
- Overall balance: Divide the horse visually into thirds. If one area looks weaker, it may be more prone to pressure points.
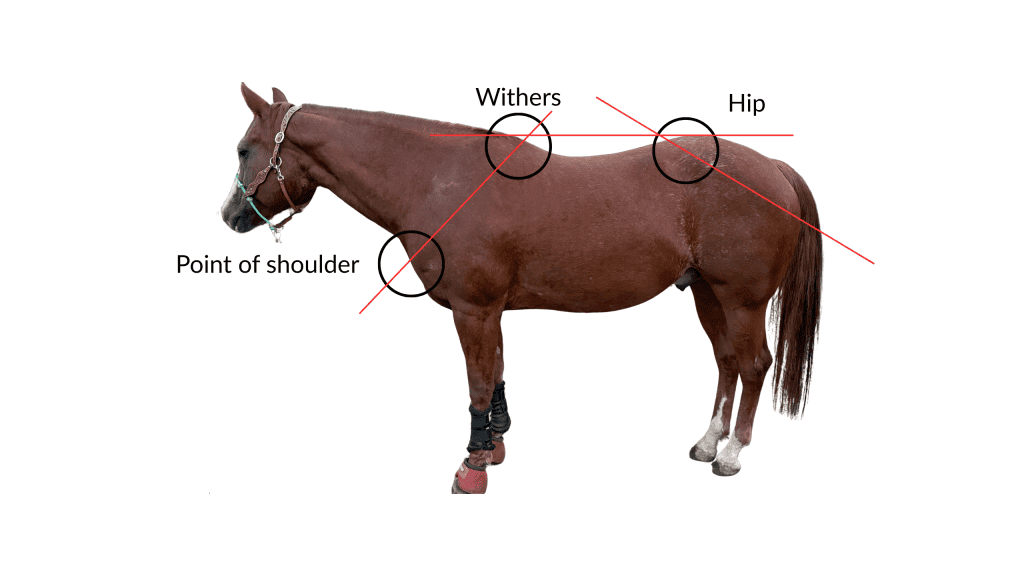
Image: shoulder, withers, hip located, lines for shoulder angle, hip angle, and topline.
(Reference and further reading: Evaluating Horse Conformation | CAES Field Report)
Step 2: How to do a Wither Tracing
- Many custom saddle makers require a wither tracing to match tree shape. Even for off-the-shelf saddles, it helps you choose the right gullet size.
- Stand the horse square with its head forward.
- Place the flexible curve 2–3 inches behind the scapula. (image)
- Mark the top center of the withers.
- Shape the curve gently to the withers without gaps or pressing in.
- Remove carefully and trace the outline onto paper.
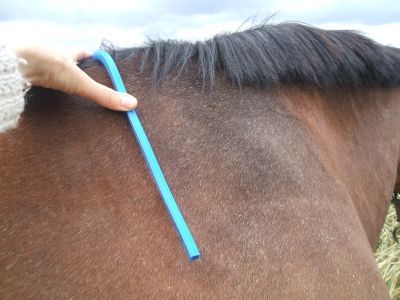
Image: Flexible curve in position for wither tracing activity.

Image: Example line drawing traced from inside edge of flexible curve.
(See instructional video found on YouTube: YouTube – How to Take a Wither Tracing)
Step 3: Gullet Sizing
Use your tracing or a manufacturer’s gullet gauge to choose the correct width. This is a good starting point to find the right fit.
- Ideal channel width: 2–4 fingers along the spine.
- English saddles: Many brands have interchangeable gullet plates. Place their gullet gauge over your tracing to find the best match.
Western saddles: Match bar angle to the tracing. Use the table below to determine suggested tree type and gullet width for a saddle to try.
When you’re shopping used saddles, get the gullet measurement from the seller. It’s best to get a picture of them measuring it so you can make sure it was done properly.
Measuring the gullet on a western saddle: At the concho level (or ~2″ below the very top of the gullet), place a straight ruler inside-to-inside across the bars. Record the inside width in inches. Use the table below to determine suggested tree type for a saddle to try.
| Wither Tracing Angle | Tree Type (Bar Style) | Typical Gullet Width | Conformation Fit |
| ~90° | Quarter Horse Bars (QH) | ~6.0″ – 6.5″ | Narrower shoulders, higher withers |
| ~94° | Semi-Quarter Horse Bars (Semi-QH) | ~6.5″ – 6.75″ | Average withers, moderately sloping shoulders |
| 100° – 106° | Full Quarter Horse Bars (FQHB) | ~7.0″ – 7.25″ | Low, broad withers; flatter, wider backs |
| 110°+ | Extra Wide / Draft Bars | 7.5″ – 8.0″+ | Very broad, flat-backed horses, drafts, mutton withers |
(Reference and additional reading: Society of Master Saddlers http://www.mastersaddlers.com/points.htm )
Step 4: Seat Size for the Rider
- The rider’s fit matters as much as the horse’s. A saddle that is too small or too large throws off balance and creates uneven pressure.
- Sit with your knees at 90°.
- Measure from the back of your knee to the back of your seat.
- Use this chart to estimate seat size:
| Rider Thigh / Upper Leg Length | English Saddle Seat Size | Western Saddle Seat Size |
| ≤ 16½ | 15″ | 13″ |
| ≈ 16½–18½ in | 16″ | 14–15″ |
| ≈ 18½–20 in | 16½″ | 15–16″ |
| ≈ 20–21½ in | 17″ | 16″ |
| ≈ 21½–23 in | 17½″ | 16–17″ |
| > 23 in | 18″ | 17–18″ |
Step 5: Trial Fitting the Saddle
Place the saddle on your horse’s bare back before adding a pad. Check:
- Wither clearance: 2–3 fingers between withers and pommel. Too tight rubs, too loose may mean poor fit.
- Panel contact: Panels should touch evenly, not lift away or flare.
- Pinching: Slide your hand under the saddle near the shoulders. If it feels tight, it will pinch in motion.
- No bridging: Avoid gaps under the middle of the saddle.
- Balance: The saddle should sit level, not tip forward or slide back.
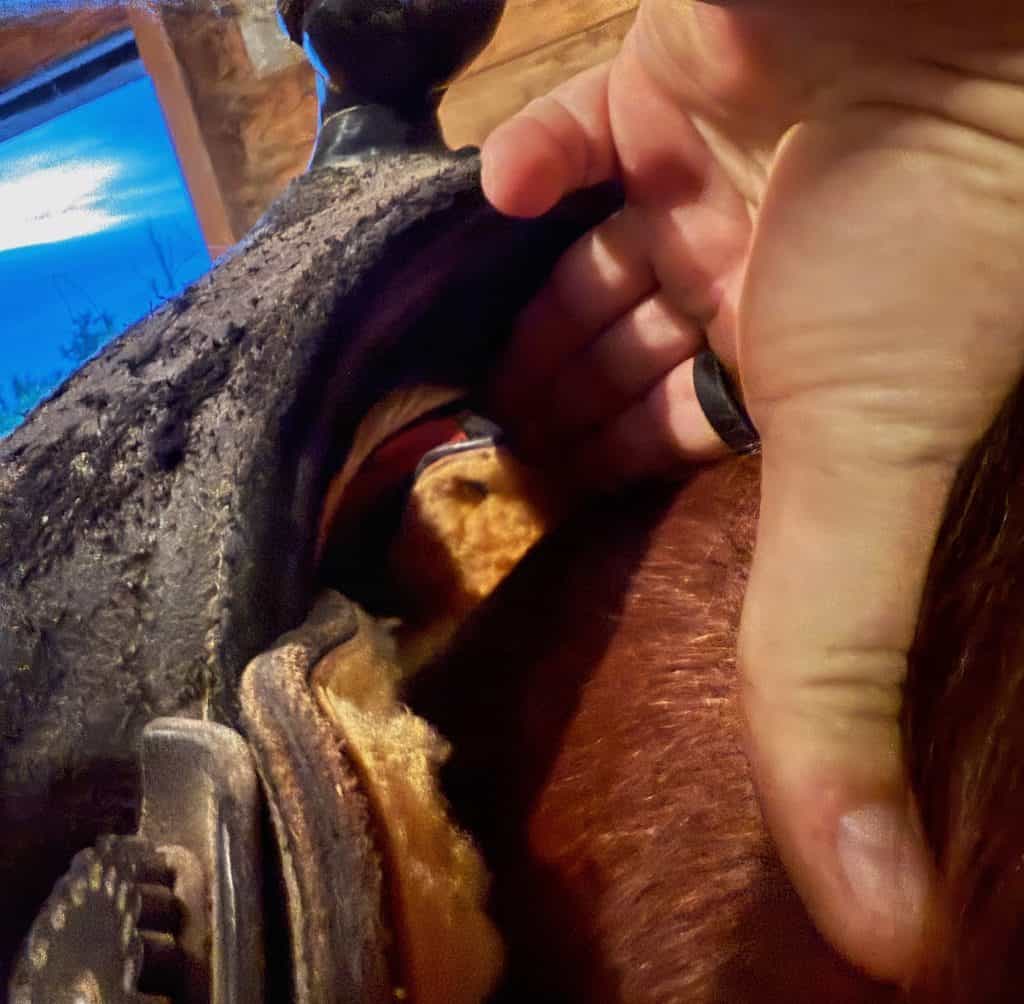
Image: Checking wither clearance.

Image: Checking panel contact for tightness.
A saddle that passes these checks is more likely to be safe and comfortable. If there are some questionable or failures in these checks, it is likely that the saddle wont fit quite right.
Step 6: Ride Test – Test the Saddle While Riding
Now tack up with a pad and ride at the walk, trot, and canter. Watch your horse and feel for changes in your balance.
Signs of poor fit:
- Pinned ears
- Hesitation to move forward
- Hollowing the back
- Short, uneven strides
- Uneven sweat marks under the pad
A good fit lets your horse move freely and rhythmically while keeping you balanced and secure in the seat.
Common Mistakes to Avoid
- Over-padding: Extra padding often increases pressure and causes soreness
- Assuming one saddle fits all: Every horse’s back is different; what works for one can harm another.
- Ignoring rider fit: If the rider doesn’t fit, balance shifts and creates uneven pressure.
Some Situations Require Expert Eyes and Tools
- Persistent behavior issues, even after adjustments
- Signs of back pain such as swelling, white hairs, or sore spots
- Unusual conformation (very high or flat withers, uneven shoulders)
- Rider feels off-balance despite correct size
- Buying a new or custom saddle
Key Takeaways for Saddle Fitting
- Start with conformation to understand your horse’s shape.
- Trial fit without a pad before riding.
- Always perform a ride test at walk, trot, and canter.
- Avoid common mistakes like relying on thick pads or ignoring rider fit.
- Don’t hesitate to hire a pro if you see pain, poor movement, or persistent issues.
A well-fitted saddle protects your horse’s health, improves performance, and makes riding safer and more enjoyable for both horse and rider.